Verification Process
After an application form is submitted, the credentialer can start verifying the record which "needs verification". Here's a brief description of the verification process: * Select the record requiring verification
- Request info from different sources by different methods
- Verify that the presented information depends on the received info
- Determine if the selected record is "verified" or "not verified"
- Audit to verification process (optional, can be configurable)
- Complete verification process
- Re-credentialing after a specific time span
Request Process
There are three factors related to the request process:
- Request for what?
- Request from where?
- Request by what?
The following describes how CPF answer these questions:
Request for what?
- Only a record that requires verification may need a request. CPF does not assume every section and/or every record requires verification. The user must determine which record needs a request by checking "Need Verification" which relates to each record.
- Request process is to prepare information for the verification process. Which means that there should be something received to correspond to the request. "Something" could be a saved web page, .doc file, .pdf file, or image file (for example, a scanned and received paper-based letter).
- CPF provides multiple approaches to help the user attach the received info to a corresponding request (e.g. upload and spyder).
- CPF has a pre-defined request process for most of the typical sections, including license, DEA, education, liability, peer reference, OIG and so on.
Request from where?
- Different sections may need to create a request from various sources. For example:
- To verify "Medical Education", the credentialer usually needs to write a letter or send an e-mail or fax to the school identified by the practitioner in the application form;
- To verify "License", credentialer will identify the specific state to which the license belongs, and then verify if a published web site exists in that state for license lookup. If it exists, go to the web site, search/check and save web page. If there is no public web site available for license lookup, credentialer will need to use alternative methods. For example, telephone, write an e-mail or a letter to request a response, or buy an annual directory, etc.
- For different sections, CPF has defined a number of different sources. To accomplish this, these definitions of source are all configurable.
- Each section has a primary source to request.
- Different sections may need to create a request from various sources. For example:
Request by what?
- CPF provides multiple request methods to make a request process more efficient.
- Request methods include "Letter", "E-mail", "Fax", "Spyder" and "Phone".
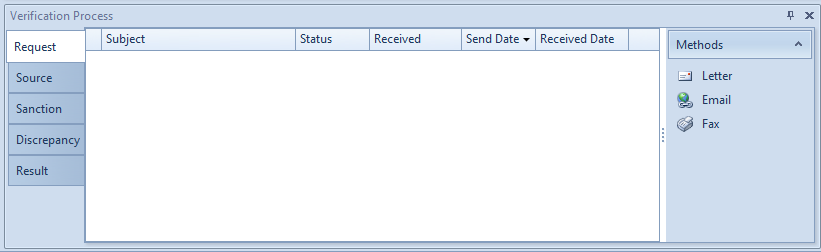
Request Methods
As the figure on the right shows, the request methods list is disabled before an application is submitted. Not all methods are suitable to all sections. What methods are available to a section are configurable.
Request by letter
- Some organizations require a paper-based letter for query and others may require a fee. The letter is an important request method.
- The "source" which requires letters include schools, institutions, hospitals, affiliations, insurance agents or other practitioners.
- To generate a request letter, CPF needs to know: what letter template should be used, does an envelope need to be printed, what is the receiver's and sender's address, and what information needs to be verified.
- CPF will do all of these tasks. The user needs to select the "Letter" method in the request methods panel, and click in the pop up window ("Notifier"). The figure below shows how to use the notifier for a letter (and/or with envelope and user content): [IMAGE HERE]
- Click the "Send/Print" button on the toolbar to print out the letter;
- User may input any information within the content and/or print it out.
- User may decide to print the envelope and user content together;
- User may setup printer and preview;
- Documentation is the main portion of the letter, which is generated with a pre-defined template and merged data. Before printing, user may open the document to preview or change its content by double-clicking a document item. The user may add or remove the new document in the document list. Here's what a document letter looks like;
[IMAGE HERE]
- Here is what the envelope looks like:
[IMAGE HERE]
Request by email
- E-mail is a more convenient method to send a request. If e-mail is acceptable to the source, select "Email" from methods list. The E-mail notifier looks like this: [IMAGE HERE]
- Make sure e-mail settings are correct or the e-mail request will not work.
- User may change the subject and e-mail content.
- Request content is in the attachment list which user can preview, update or add/remove other attachments.
Request by fax
- Fax is another alternative. It requires that the server side has fax gate support (hardware and software).
- A fax is just like an email request. But there must be a fax number and fax gate e-mail address provided. Depending on the type of fax gate used, the fax number and fax gate e-mail must be combined in a specific format.
Request by phone and IM
- Presently, CPF does not support integration of phone and IM;
Request by Spyder
- Spyder is an automatic (or semiautomatic) approach to retrieve a source online. In its current version the Spyder, as a request method is applied to the license and DEA section to help the user improve efficiency.
- To run Spyder for a request, make sure the necessary info has been provided, for example:
- For Spyder retrieval of a license, license state and license number are required. Practitioner's name is necessary for some states as well;
- For Spyder of DEA, the DEA number is required; [IMAGE and spyder description]
Request Process Workflow
Once a request (letter, e-mail, spyder, etc.) is sent successfully, the request action will be logged. [IMAGE HERE]
The sent request action expects a response. The response could be a copy of a received letter, a reply e-mail or a web page. The user can attach any response to the logged request action. [IMAGE HERE]
(To attach received info to a specific request action, make sure the "Received" flag is checked (this is a necessary status in request process). Click "…." button to upload the received file. Following that, the uploaded file will be listed in the "Received Files" list (and appear in Source List later). The User can review the received file by double-clicking the listed item.)
The response to a request can be immediate, such as requested by Spyder. In this way, the user can receive a saved web page and extracted info directly.
(The received file is there automatically only if running the spyder catches the web page successfully. Certainly, the user could also upload other existing file(s) here by clicking the "..." button)
The response could also have a time lag, such as a request by letter or e-mail. In this situation, the user may have to wait for a reply, perhaps a few hours, days or months. To avoid the endless waiting for a response and manage this request process better some rules have been designed for the request process:
- A request process is compiled with a series of request actions. Which means:
- The user sends a request and waits for received info for a "specific" duration/time;
- If nothing is received after the duration/time, then send another request and wait again;
- Repeat this step for a "specific" time. Every time a request is sent, CPF may select a "specific" template with a different content;
- If anything is received, attach it to the latest request action.
- If nothing is received, user may determine how to do a subsequent work around. (It's a principle in CPF design: to provide support and a pre-defined process and resource as reasonably as possible, but never force the user to do or not do their work);
- All the above factors marked "specific" means they are configurable. What kind of templetes should be chosen? How many times the request should be sent if nothing is received? And how long the duration between each request should be? The answer to these questions is "up to you", although CPF has pre-defined reasonable settings for these options.
- If no request is ever received, user could select a method and start a new request process. And this request action will be logged and managed in the first request process as shown in the first figure.
- If the user wishes to do another request, after selecting a method, CPF prompts a confirmation box to ask if a new request process is starting. By selecting "Yes", CPF will start a new request process. Selecting "No" means user did not receive any info yet, and CPF will perform another request action within the currently selected request process in order to hasten the process. As a result, this request action will be managed in the current selected request process. [IMAGE HERE]
- User may start multiple request processes which are used to:
- request with a new method
- start a request process for re-credentialing
- A record with multiple request processes looks like this: [IMAGE HERE]
- There are a few ticklers to help the user list all the records which "need to do a 2nd request" or "need to do a 3rd request". Thus the user does not always have to remember when/what record needs another request;
- A request process is compiled with a series of request actions. Which means:
Source List
 The purpose of the request process is to obtain available received info as a source. With this info the user can perform verification. "Source List" is the place to manage all these sources.
[IMAGE HERE]
The verification process will refer to the files in a source list. But not all the files are necessarily included in an application form package. To include a source file in the final application form the user needs to select it and mark an appropriate source type for it.
There are two ways to obtain source files:
The purpose of the request process is to obtain available received info as a source. With this info the user can perform verification. "Source List" is the place to manage all these sources.
[IMAGE HERE]
The verification process will refer to the files in a source list. But not all the files are necessarily included in an application form package. To include a source file in the final application form the user needs to select it and mark an appropriate source type for it.
There are two ways to obtain source files:
- Received files by request process.
- Uploaded files by user (by clicking "Upload" button in right panel or clicking the "Upload" link button in the section record's action panel).
Sanction & Discrepancy
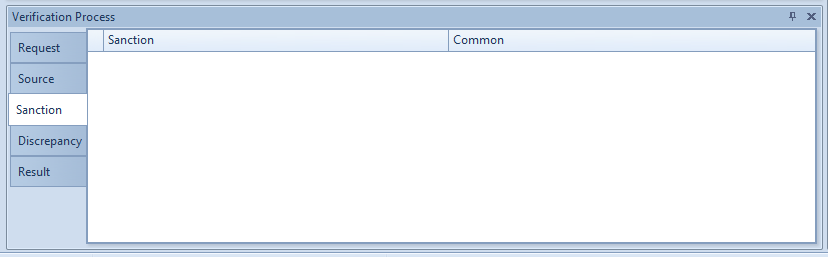
 Sanction and Discrepancy is to help the user record issues in the verification process. This figures shows how to use Sanction in the verification process:
[IMAGE HERE]
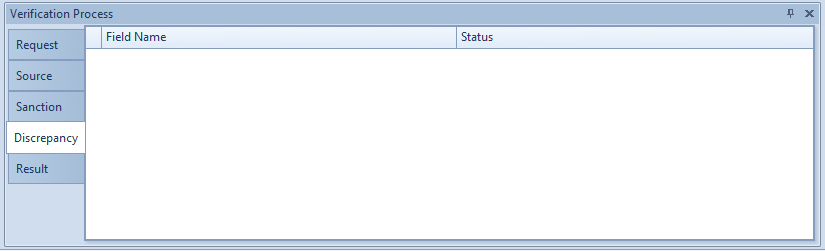
This figures shows how to use Set Discrepancy in the verification process:
[IMAGE HERE]
Sanction and Discrepancy is to help the user record issues in the verification process. This figures shows how to use Sanction in the verification process:
[IMAGE HERE]
This figures shows how to use Set Discrepancy in the verification process:
[IMAGE HERE]
Sanction and Discrepancy are aids in the verification process. They are not required.
Verification Result
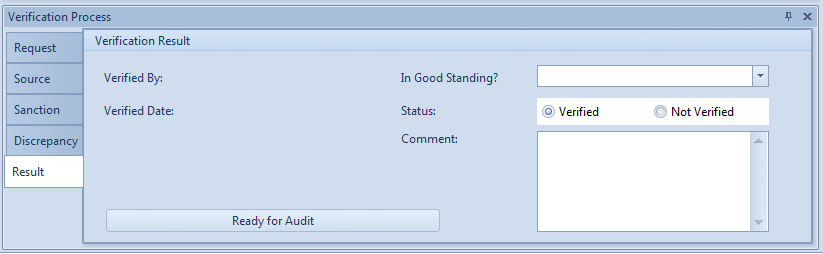 User must provide a result for the verification process. "Result" panel is the place to do this. User needs to do the following to complete the verification process: •Answer if current record, which is verified, is in good standing.
- Answer if current record passed verification or not.
- Leave any comments for the verification process.
- Click "Verification Completed" button to complete the verification process.
As the following figure shows:
The verification process are not available for use) (The request process is not a part of the verification process, so request is always available to use) There are two things that may require the completed verification process be redone:
- If an "Audit" process is required (by config), and if an audit of a completed verification process does not pass, the verification process has to restart;
- Re-credentialing.
Audit Process
TBD.